Embedded System Development with STM3242I-SK and IAR
Embedded systems are everywhere in our daily lives, ranging from simple consumer devices to complex industrial systems. These systems provide the intelligence behind devices and machines, and without them, many of our modern conveniences would not be possible. This is why it’s important to understand how to develop these systems and the tools and technologies involved.
In this post, we will explore the STM3242I-SK microcontroller board and the IAR Embedded Workbench, a powerful integrated development environment (IDE) for embedded systems. We will cover the basics of embedded system development, discuss the features and capabilities of the STM3242I-SK board, and provide a step-by-step guide on how to use IAR to develop, compile, and debug embedded applications.
Understanding Embedded System Development
Embedded systems are electronic systems that are designed to perform a specific task or set of tasks. They are often designed to operate in real-time environments, where they must respond quickly to external stimuli or input. Examples of embedded systems include automotive systems, medical devices, consumer electronics, and industrial control systems.
Developing software for embedded systems requires a different set of tools and techniques when compared to traditional desktop or mobile application development. This is because embedded systems have limited resources, including memory and processing power, and must operate within strict constraints such as real-time deadlines and power consumption limits.
The development process for embedded systems typically involves the following steps:
1. Design - defining the system requirements and hardware components
2. Development - writing and testing the software code
3. Integration - combining the software and hardware components
4. Testing - validating the functionality and performance of the system
5. Deployment - installing and maintaining the system
Introducing the STM3242I-SK Board
The STM3242I-SK board is a powerful development platform that is designed to help engineers and developers create embedded applications quickly and easily. The board features an STM32F42X microcontroller, which is based on the ARM Cortex-M4 processor. This processor is capable of executing complex mathematical operations at high speeds, making it ideal for real-time applications.
The board includes several features to help developers get started quickly, including:
Power management and regulation circuitry
USB and Ethernet interfaces
SD card slot
Accelerometer and gyroscope sensors
Audio codec
External memory interface
With these features, the STM3242I-SK board provides everything you need to get started with embedded system development.
Getting Started with IAR Embedded Workbench
IAR Embedded Workbench is a powerful IDE that is specifically designed for embedded system development. The IDE provides all the necessary tools for developing, debugging, and deploying code on the STM3242I-SK board. In this section, we will provide a step-by-step guide on how to set up and use IAR for embedded system development.
Step 1: Installing IAR Embedded Workbench
To get started, download and install the latest version of IAR Embedded Workbench from the IAR website. Once installed, launch the IDE and create a new project.
Step 2: Setting up the Project
In the new project window, select the STM32F42X device family from the list of supported devices. Then, select the STM3242I-SK board as the debug interface. Finally, choose the C language as the primary language for your project.
Step 3: Writing and Compiling Code
Next, write your code using the C language and save it in your project folder. Then, compile your code by selecting the Build command from the toolbar. IAR will compile your code and create a binary file that can be loaded onto the STM3242I-SK board.
Step 4: Debugging Your Application
To debug your application, connect the STM3242I-SK board to your development machine using the USB interface. Then, select the Debug command from the toolbar to launch the debugger. The debugger will allow you to step through your code, set breakpoints, and view the values of variables.
Step 5: Deploying Your Application
Once you have validated and debugged your application, you can deploy it onto the STM3242I-SK board. Simply connect the board to a power source and load the binary file onto the board using the USB or Ethernet interface.
Conclusion
Embedded system development is an exciting and rewarding field that requires specialized tools and techniques. The STM3242I-SK board and IAR Embedded Workbench provide a powerful and easy-to-use platform for developing, testing, and deploying embedded applications. By following the steps outlined in this post, you can get started with embedded system development quickly and easily. So, what are you waiting for? Start developing your own embedded systems today!
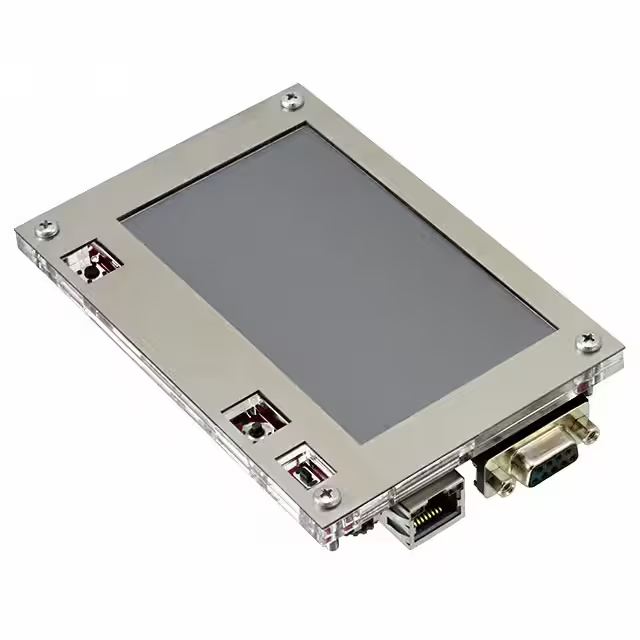
STM3242I-SK/IAR
- Part Number :
- STM3242I-SK/IAR
- Manufacturer :
- STMicroelectronics
- Description :
- IAR KICKSTART STM32F429 EVAL BRD
- Datasheet :
-
 STM3242I-SK/IAR.pdf
- Unit Price :
- Request a Quote
- In Stock :
- 2388
- Lead Time :
- To be Confirmed
- Quick Inquiry :
- - + Add To Cart
Request a Quote
STM3242I-SK/IAR Specifications
STM3242I-SK/IAR Guarantees

-
Service Guarantees
We guarantee 100% customer satisfaction.
Our experienced sales team and tech support team back our services to satisfy all our customers.

-
Quality Guarantees
We provide 90 days warranty.
If the items you received were not in perfect quality, we would be responsible for your refund or replacement, but the items must be returned in their original condition.
Certified Quality
 View the Certificates

